Thursday, December 20, 2012

DIY--Mason Jar Soap Dispenser


Like a lot of other people, I seem to have a fascination with mason jars. In fact, I like them so much, I used them in different sizes as vases for my wedding. 


In addition to this, though, I love all the different types of projects one can do with them. I’ve taken to pinning my favorite ideas to Pinterest for future use.

One of the ideas I came across but didn’t actually pin was for a Mason Jar Soap Dispenser. We had been leaving our large dish soap container on the counter because we didn’t have a nicer looking container to put the soap in, so when I initially came across this idea, I thought it was a great idea and hopefully a simple enough project to put together.

I searched several different websites while looking for a good (and easy!) way to make a mason jar soap dispenser. Some were definitely too complicated, but I finally found directions that were doable! It took me a month or so, but I finally gathered my supplies and took a half hour to make my new soap dispenser. Success! I LOVE the way it looks. Happy days!


To make your own:

Gather a medium sized mason jar (found at your local craft store or grocery store), a pump from an empty soap bottle, a hammer, a nail, and craft glue.


With the lid on the mason jar, place the nail in the center of the lid. Hammer until a hole breaks through the center. Continue to hammer the nail into the lid around the center, widening the hole until the soap pump fits into the lid.

Place the soap pump into the lid. Carefully lift the pump slightly and apply glue to secure pump to lid. Allow the glue to dry overnight. Add soap, and Voila! Your very own mason jar soap dispenser!


Sunday, December 2, 2012

Snow!

Last week we had our first snow of the season! Now, I'm much more of a summer/fall type person; not so much a fan of the winter because it gets soooo cold. But I do love the snow. Especially for the Holidays!

We were actually surprised by how much accumulated being that the forecast was for a mix of snow and rain. And of course, a week later, the snow is already gone. But I was so inspired by the beauty of the falling snow that I had to have a snow adventure during my lunch break at work. Enjoy the results below. :-)

"Snow Flakes" by Emily Dickinson

Snow flakes.

I counted till they danced so
Their slippers leaped the town,
And then I took a pencil
To note the rebels down.
And then they grew so jolly
I did resign the prig,
And ten of my once stately toes
Are marshalled for a jig!


Tuesday, November 20, 2012

Cheesy Garlic Biscuits


I was surfing Pinterest a couple weeks ago, and I came across a recipe for biscuits that boasted that they tasted like the ones you get at Red Lobster. Which everyone knows are the best reason to go to Red Lobster haha. So, even though I doubted that they could really live up to Red Lobster’s biscuits, I wanted to try out the recipe anyway, especially because it looked super easy.

It was a good gamble. The biscuits were de-lish! And they were indeed super easy to make. I wouldn’t go as far as to endorse them as being as good as Red Lobster’s….but they’re definitely worth making. And enjoying. A lot.


Gather the Ingredients:

     1 ½ Cups Bisquick
     1 ½ Cups shredded cheddar cheese
     1/2 Cup milk
     2 tablespoons butter
     1 tablespoon oregano
     3/4 tablespoon garlic salt

Combine Bisquick, milk, and cheese in a medium bowl and mix well to form a sticky dough (you may need to add an extra splash or two of milk to get enough stickiness). Drop by spoonful onto a greased cooking sheet about 1 ½ inches apart. Bake at 400 degrees for 10 minutes or until lightly golden.

In a small bowl, melt butter and then mix in oregano and garlic salt. Brush butter mixture over biscuits and return to oven for another 2 to 4 minutes. Mmm, garlicky goodness!


Monday, November 12, 2012

It's a Sweet Potato Thing


One of my favorite seasonal dishes is sweet potato casserole. My mouth waters just thinking about it. Whether it’s chunks of yams or whipped potatoes, it all tastes yummy! Thinking on this, I decided to do a search for a sweet potato casserole recipe. And, of course, the best way to find what you’re looking for is to search Google Images haha! If it looks good, then it should probably taste good, right?

I looked at a few different recipes before deciding on one that looked doable. The only problem was that the recipe would make quite a lot—more than D. and I would eat, even with leftovers. But I didn’t want to wait until Thanksgiving to try it out. So I decided to half the recipe and do a test run. If it turned out good, I’d make the full recipe for Thanksgiving with the In-Laws.

Oh boy, was it ever a great test! Pretty easy to make, and it was delicious! D. commented that the casserole almost tasted like dessert. It’s a go for Thanksgiving for sure!

Gather the Ingredients:

     For the sweet potatoes:
     2 1/2 lbs sweet potatoes, peeled and cubed (about 4 potatoes of medium size)
     3/4 Cup sugar
     1/4 Cup evaporated milk
     3 tablespoons butter, melted
     1/2 teaspoon salt
     1 teaspoon vanilla extract
     2 eggs

     For the topping:
     1/3 Cup flour
     2/3 Cup packed brown sugar
     1/8 teaspoon salt
     2 tablespoons butter, melted
     1/2 to 1 Cup chopped pecans


Place sweet potatoes in a pot and cover with water. Bring to a boil. Reduce heat and simmer for 20 minutes or until tender. Drain and cool about 5 minutes.

Place the cooked sweet potatoes in a large bowl; add sugar, evaporated milk, butter, salt, and vanilla. Beat with a mixer at medium speed until smooth (I didn’t feel like getting out my mixer, so I just beat it together with a wooden spoon). Add eggs; beat well. Pour sweet potato mixture into a greased cooking dish.


For the topping, combine flour, brown sugar, and salt; mix thoroughly with a fork until the mixture resembles course crumbs. Stir in butter and mix well. Sprinkle topping evenly over sweet potatoes and then top with pecans. Bake at 350 degrees for 25 minutes or until golden. Savor the sweetness!


Saturday, November 10, 2012

Do It!


Food for thought: you don’t have to wait for New Year’s to start a resolution. Instead of putting it off until a better time, if you want to make a change in your life, do it now. There will always be something to distract you; there will always be something you’d rather be doing. But if you truly want that change, you have to take action, you have to put in work, you have to chase it. That’s the point of this blog. I could sit on my couch and enjoy looking at what other people have done (and I still do this too haha). Or I can get off my butt and start something new. Life goes by too quickly for us to let it just pass us by.....what are you going to do today?


Sunday, November 4, 2012

Bananas for Banana Bread


I don’t mind saying it. My mother makes the absolute best banana bread in the whole world. Well, actually, all of her food is the best in the whole world, but this post is about banana bread. I know that we may disagree (your mother’s banana bread may be the best to you), and that’s ok. But I absolutely love my mother’s banana bread.

The thing about her banana bread is that it is exceptionally moist. It has the perfect balance in taste between banana, nuts, and creamy goodness. When I was a kid, I didn’t like nuts, so my mom would sometimes make special mini-loaves of her banana bread without the nuts just for me. Now, though, I’ve found that I do enjoy nuts after all, so when I make her banana bread, I add the nuts back in.

Fall is a wonderful time for sweet breads, especially when you warm them up and spread a little butter on top. And banana bread, in particular, is incredibly easy to make. So, gather your supplies, mix and mash the ingredients, bake, and then sit back and enjoy the results.


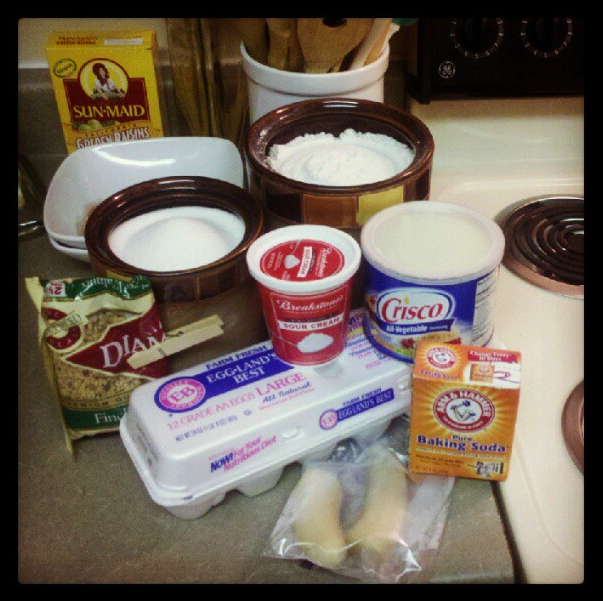
Gather the ingredients:

     2 Cups flour
     1 tsp baking soda
     1/2 tsp salt
     1/2 Cup shortening (a stick of Oleo, Crisco, etc.)
     1 1/2 Cups sugar
     2 eggs, slightly beaten
     1 Cup sour cream
     1 Cup mashed bananas (about 2 large)
     3/4 Cup finely chopped walnuts

Sift together flour, baking soda, and salt. Set aside. In a medium bowl, cream shortening and sugar. Add eggs. Then add sour cream and bananas. Mix in sifted ingredients. When thoroughly combined, stir in nuts.


Pour batter into two greased loaf pans. Bake at 350 degrees for 50 minutes or until toothpick comes out clean. Enjoy!